영상처리 이용한 ITS장비 SW개발
개요
큰비젼 황태현 이사 교육 내용
#0 OpenCV 관련 설정
1. contours2.cpp 관련 OpenCV
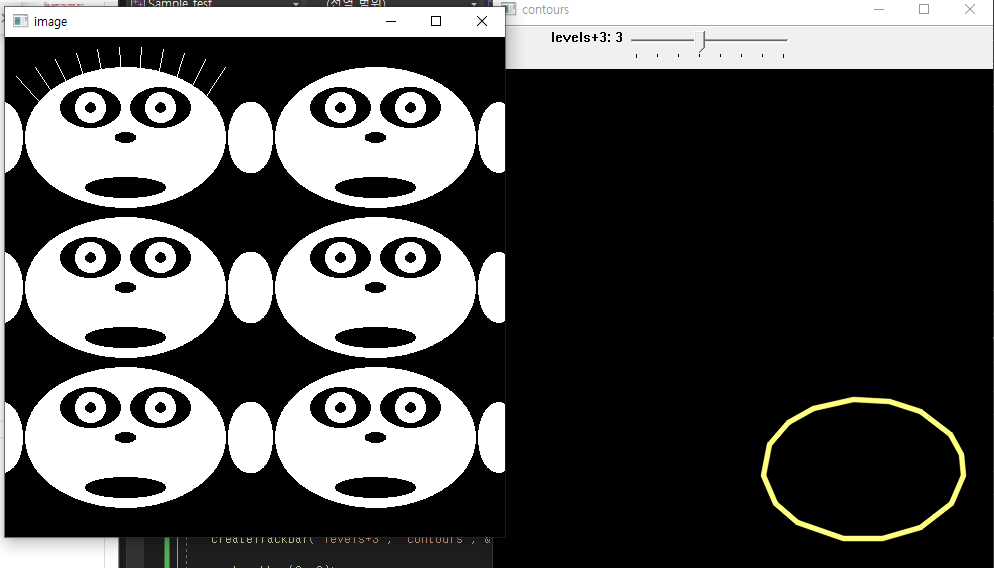
실행 화면
전체 코드
#include "opencv2/imgproc.hpp"
#include "opencv2/highgui.hpp"
#include <math.h>
#include <iostream>

using namespace cv;
using namespace std;

static void help(char** argv)
{
    cout
        << "\nThis program illustrates the use of findContours and drawContours\n"
        << "The original image is put up along with the image of drawn contours\n"
        << "Usage:\n";
    cout
        << argv[0]
        << "\nA trackbar is put up which controls the contour level from -3 to 3\n"
        << endl;
}

const int w = 500;
int levels = 3;

vector<vector<Point> > contours;
vector<Vec4i> hierarchy;

static void on_trackbar(int, void*)
{
    Mat cnt_img = Mat::zeros(w, w, CV_8UC3);
    int _levels = levels - 3;
    drawContours(cnt_img, contours, _levels <= 0 ? 3 : -1, Scalar(128, 255, 255),
        3, LINE_AA, hierarchy, std::abs(_levels));

    imshow("contours", cnt_img);
}

int main(int argc, char** argv)
{
    cv::CommandLineParser parser(argc, argv, "{help h||}");
    if (parser.has("help"))
    {
        help(argv);
        return 0;
    }
    Mat img = Mat::zeros(w, w, CV_8UC1);
    //Draw 6 faces
    for (int i = 0; i < 6; i++)
    {
        int dx = (i % 2) * 250 - 30;
        int dy = (i / 2) * 150;
        const Scalar white = Scalar(255);
        const Scalar black = Scalar(0);

        if (i == 0)
        {
            for (int j = 0; j <= 10; j++)
            {
                double angle = (j + 5) * CV_PI / 21;
                line(img, Point(cvRound(dx + 100 + j * 10 - 80 * cos(angle)),
                    cvRound(dy + 100 - 90 * sin(angle))),
                    Point(cvRound(dx + 100 + j * 10 - 30 * cos(angle)),
                        cvRound(dy + 100 - 30 * sin(angle))), white, 1, 8, 0);
            }
        }

        ellipse(img, Point(dx + 150, dy + 100), Size(100, 70), 0, 0, 360, white, -1, 8, 0);
        ellipse(img, Point(dx + 115, dy + 70), Size(30, 20), 0, 0, 360, black, -1, 8, 0);
        ellipse(img, Point(dx + 185, dy + 70), Size(30, 20), 0, 0, 360, black, -1, 8, 0);
        ellipse(img, Point(dx + 115, dy + 70), Size(15, 15), 0, 0, 360, white, -1, 8, 0);
        ellipse(img, Point(dx + 185, dy + 70), Size(15, 15), 0, 0, 360, white, -1, 8, 0);
        ellipse(img, Point(dx + 115, dy + 70), Size(5, 5), 0, 0, 360, black, -1, 8, 0);
        ellipse(img, Point(dx + 185, dy + 70), Size(5, 5), 0, 0, 360, black, -1, 8, 0);
        ellipse(img, Point(dx + 150, dy + 100), Size(10, 5), 0, 0, 360, black, -1, 8, 0);
        ellipse(img, Point(dx + 150, dy + 150), Size(40, 10), 0, 0, 360, black, -1, 8, 0);
        ellipse(img, Point(dx + 27, dy + 100), Size(20, 35), 0, 0, 360, white, -1, 8, 0);
        ellipse(img, Point(dx + 273, dy + 100), Size(20, 35), 0, 0, 360, white, -1, 8, 0);
    }
    //show the faces
    namedWindow("image", 1);
    imshow("image", img);
    //Extract the contours so that
    vector<vector<Point> > contours0;
    findContours(img, contours0, hierarchy, RETR_TREE, CHAIN_APPROX_SIMPLE);

    contours.resize(contours0.size());
    for (size_t k = 0; k < contours0.size(); k++)
        approxPolyDP(Mat(contours0[k]), contours[k], 3, true);

    namedWindow("contours", 1);
    createTrackbar("levels+3", "contours", &levels, 7, on_trackbar);

    on_trackbar(0, 0);
    waitKey();

    return 0;
}
프로그램 설명
drawContours를 이용하여 영역을 구별해주는 함수 활용법을 사용해 보는 프로그램입니다
사용 OpenCV 함수
– 그리기 위해 사용한 함수 Mat img = Mat::zeros(w, w, CV_8UC1); //전체 이미지 크기 mat 설정 ellipse 단순하거나 두꺼운 타원 호를 그리거나 타원 섹터를 채웁니다
### void ellipse(InputOutputArray img, Point center, Size axes, double angle, double startAngle, double endAngle, const Scalar& color, int thickness = 1, int lineType = LINE_8, int shift = 0
@param img Image. 이미지 @param center Center of the ellipse. 중심 타원 중심 @param axes Half of the size of the ellipse main axes. 타원 축 중심 @param angle Ellipse rotation angle in degrees. 회전 정도 @param startAngle Starting angle of the elliptic arc in degrees. 시작 각도 @param endAngle Ending angle of the elliptic arc in degrees. 끝나는 각도 @param color Ellipse color. 색정보 @param thickness Thickness of the ellipse arc outline, if positive. Otherwise, this indicates that a filled ellipse sector is to be drawn. 두깨 @param lineType Type of the ellipse boundary. See #LineTypes 라인타입 @param shift Number of fractional bits in the coordinates of the center and values of axes. 중심에서 이동 정도
findContours( img, contours0, hierarchy, RETR_TREE, CHAIN_APPROX_SIMPLE);
CV_EXPORTS_W void findContours( InputArray image, OutputArrayOfArrays contours, OutputArray hierarchy, int mode, int method, Point offset = Point());
첫번쨰 인자 (InputArray imag 싱글 이미지 ) 두번쨰 인자 (utputArrayOfArrays contours contour 결과 이미지 )
이해 안되는 부분. 세번째 인자 ( OutputArray hierarchy 옵션 결과 이미지) 네번쨰 인자 ( int mode 컨투어 방법) 다섯번쨰 인자 ( Point offset 컨투어 이동하는 값 특정 상황에서 유리하다는데 이해가 안됨 )
void drawContours( InputOutputArray image, InputArrayOfArrays contours,
                          int contourIdx, const Scalar& color,
                          int thickness = 1, int lineType = LINE_8,
                          InputArray hierarchy = noArray(),
                          int maxLevel = INT_MAX, Poin
- InputOutputArray image, 입력 이미지
- InputArrayOfArrays contours, 모든 contur 이미지 배열로 저장한다
- int contourIdx, 보여주기 위한 정보
- const Scalar& color, 컬저 정보 5.int thickness = 1, 선 두꺠
- int lineType = LINE_8, 선 정보 이해 안되는 부분.
- InputArray hierarchy = noArray(), //계층
-
int maxLevel = INT_MAX,
- Point offset = Point()
프로그램 코드 설명
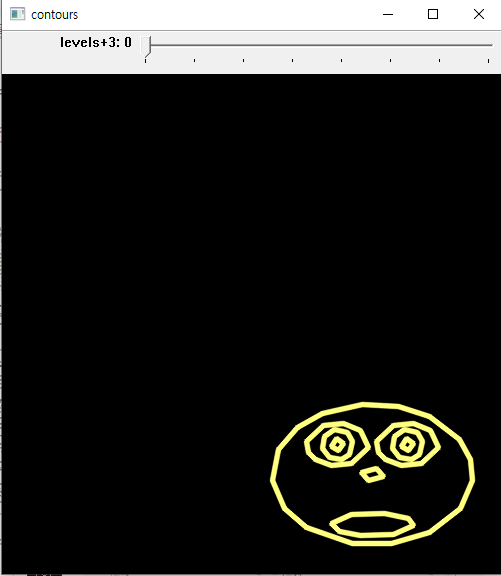
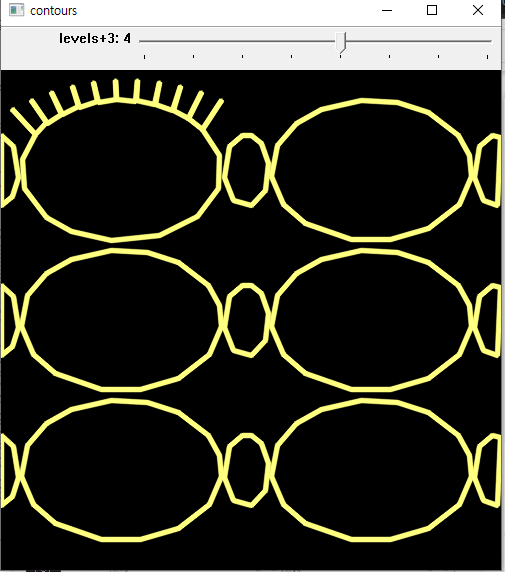
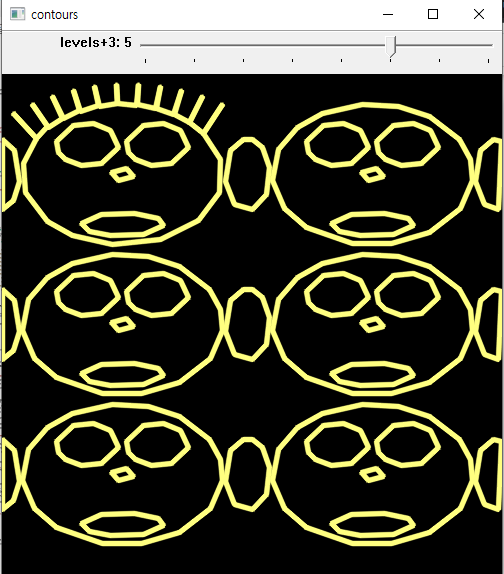
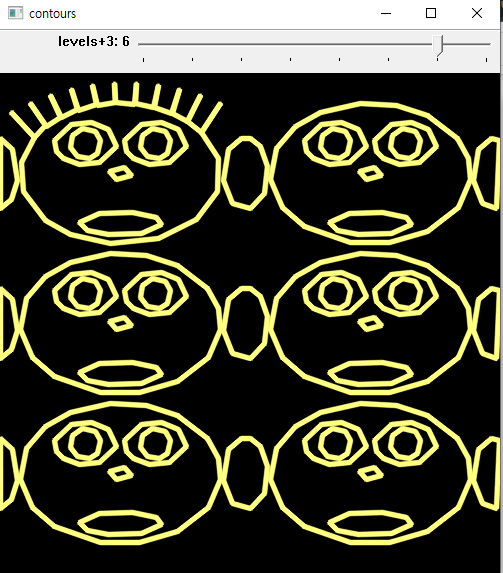
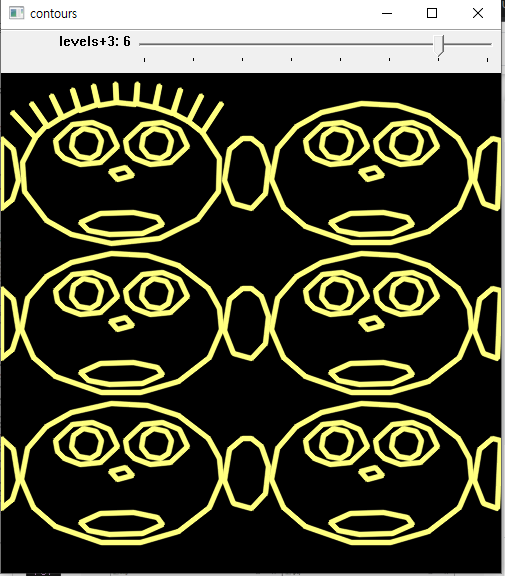
상단 사이드바에서 단계를 조정한다. 상단 값인
drawContours(cnt_img, contours, _levels <= 0 ? 3 : -1, Scalar(128, 255, 255), 3, LINE_AA, hierarchy, std::abs(_levels)); 이 중요하다
0단계 지정댄 윤각선만 그립니다.
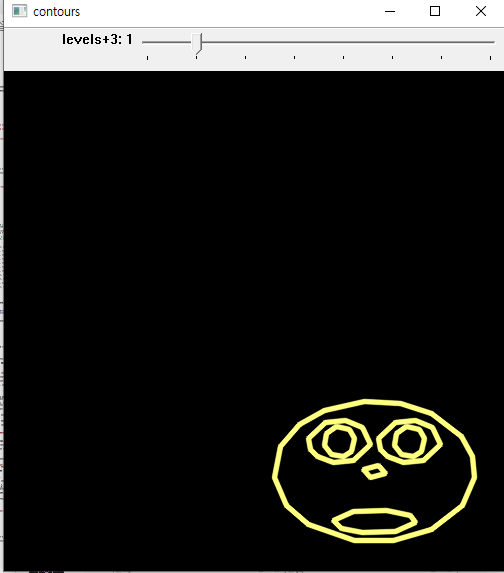
1단계 이웃한 윤각선만 그립니다.
2단계 모든 윤각선을 그립니다
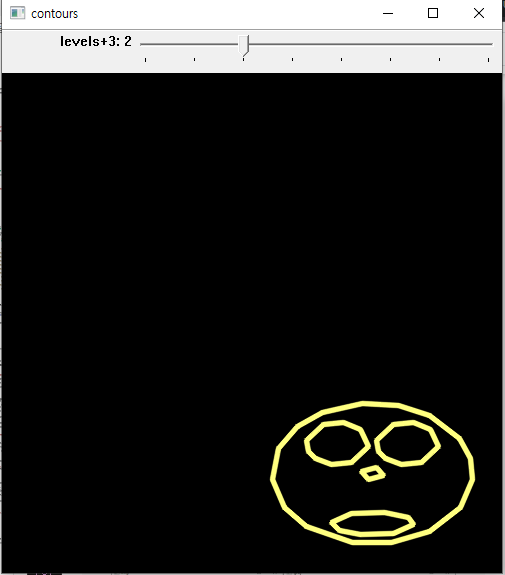
« 이전 단계인 경우 범위가 제한 되어있고 » 아래 같은 경우 전체 영상에서 외작 계층 1단계에서부터 안쪽이 점점 보이는 모습이 보여준다
댓글남기기